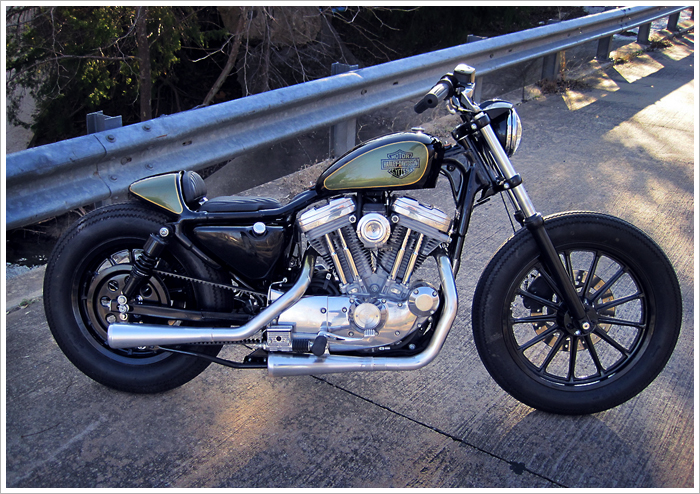

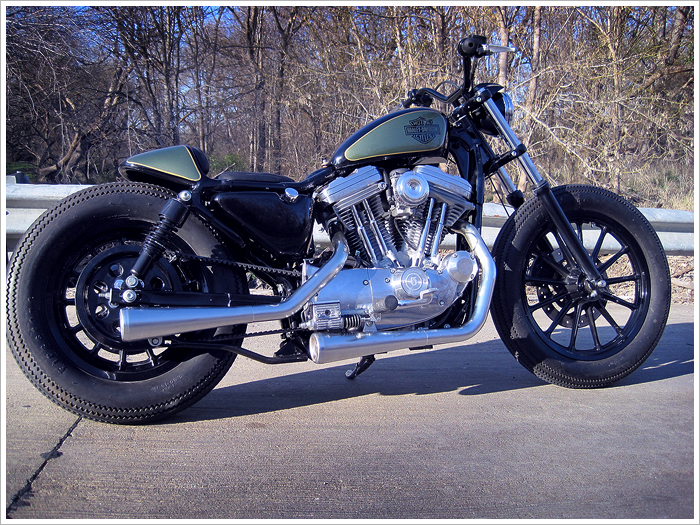
Harley-Davidson motorcycles. You either love them or hate them. They may have a reputation for poor build quality but let’s leave that debate at the door for a moment. Why? Because when it comes down to it, when they are done right these bikes can make you want to trade in your Japanese metal for some good ol’ American iron and to hell with the consequences. Like this clean Sportster, built by Cory from Maindrive Cycles in Texas, USA. Corey specializes in Harley’s but the last bike he built for the same client Andy Hines was a Kawasaki KZ400. So when Andy approached him to turn his Sportster into something a bit more bespoke, Corey was much more at home this time around. Even though he had never worked on a Sportster before. Over to Cory for the whole build story.
“I had built a sweet little KZ400 Street Tracker for Andy last year, which he really enjoys riding as much as possible, but he was finally ready for his first American bike. He found a very low mileage 2003 Sportster on Craigslist for a steal, and began putting his own touches on it, like lowered suspension, custom handlebars, vintage tires, and blacked out wheels and front end. It was a really big improvement over the stock version, but it still lacked the true custom look that he was going for… so to my garage it came! That was fine by me, as American bikes are my specialty. The only thing was, I had never worked on a Sportster before, so I figured this would be as good a time as any to dive in head-first and learn!”
“I immediately got to work tidying up the factory wiring harness. Since all the factory handlebar switch housings and blinkers were gone, there were alot of wires that could be eliminated. To clean up the area above the front cylinder, I relocated the ignition coil to the top motor mount, and moved the keyswitch to the bottom of the battery tray. I like using those marine-style keyswitches that eliminate the starter relay and allow you to start the bike like your car, just by twisting the key to engage the starter motor.”
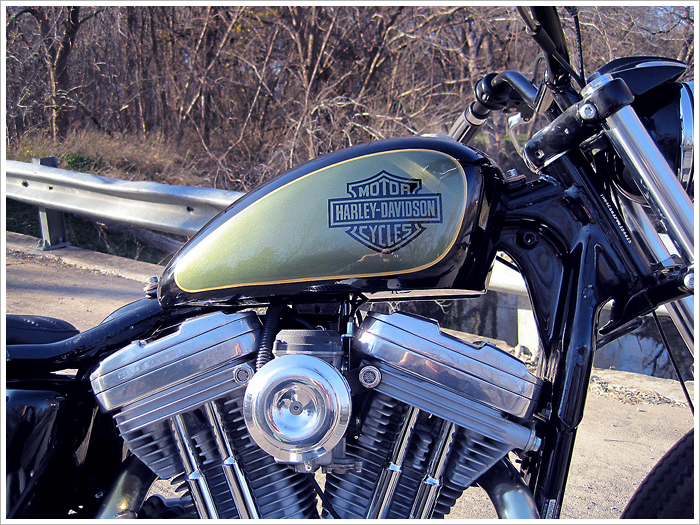
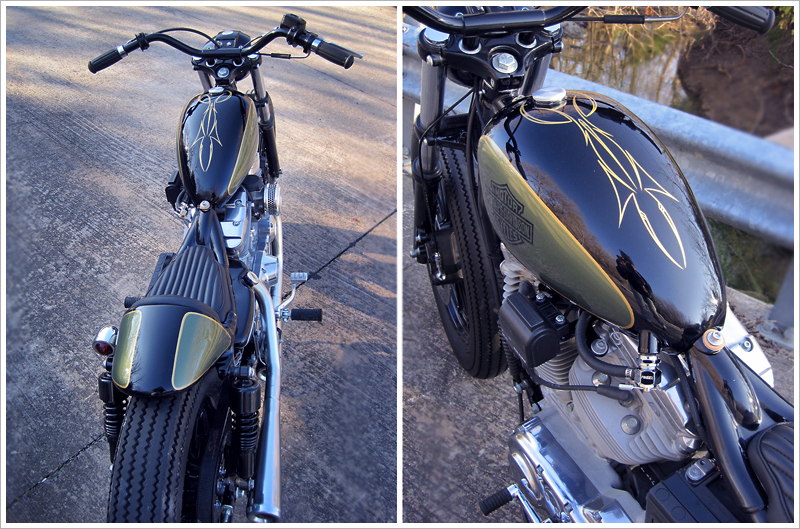
“Now it was time for the REAL fabrication to begin. If this bike was going to have a true custom look, it would need a handmade gas tank. My goal was to build a tank that had classic proportions, and would look like something the factory should’ve built in the first place. I don’t build any bucks or patterns for my tanks, but just kinda ‘wing it’ as I go. Well, I guess the juices were flowing in just the right way at the time, because this tank ended up being the nicest tank that I’ve ever done. I wanted to keep it for myself! I finished it off by welding one of my Pro-Vent gas caps up high and locating the petcock bung at the very rear to get the most usable capacity possible.”
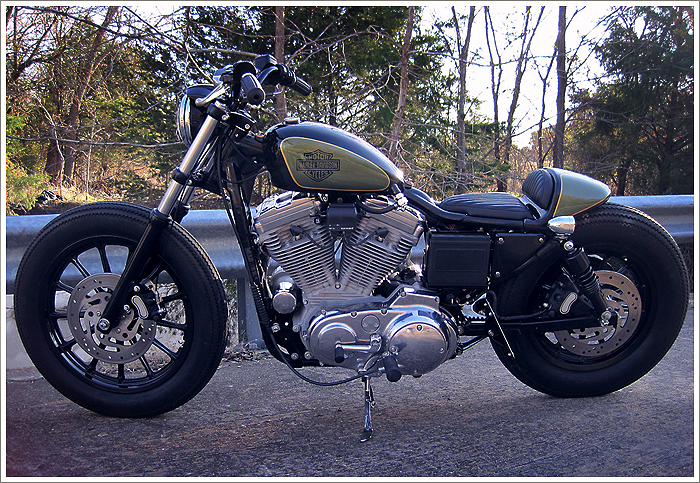
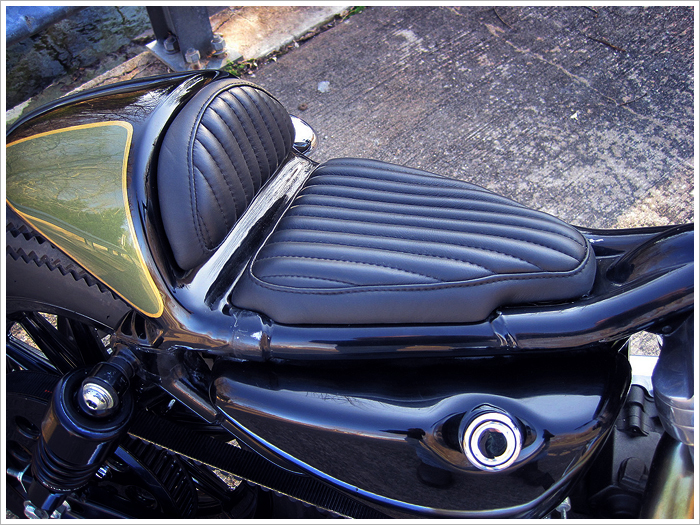
“With the tank done, it was time to build a tailsection. I’m not a fan of mass-produced, bolt-on tail sections that usually end up looking like an afterthought. Just like I did on Andy’s KZ400, I wanted to make the tail section an integral part of the bike. This does present a slight challenge for the painter to blend into the existing frame, but I knew the result would look better than any bolt-on ever would. After chopping off the factory fender struts, I welded a loop of 1″ tubing to the frame to serve as the foundation. Next, it was just a matter of banging out the panels from steel until I felt I had a shape that flowed nicely with the rest of the bike. For the seat, I wanted to do something a little different than the norm, so I made a 2-piece setup inspired by the minimalist seats used on MotoGP bikes.”
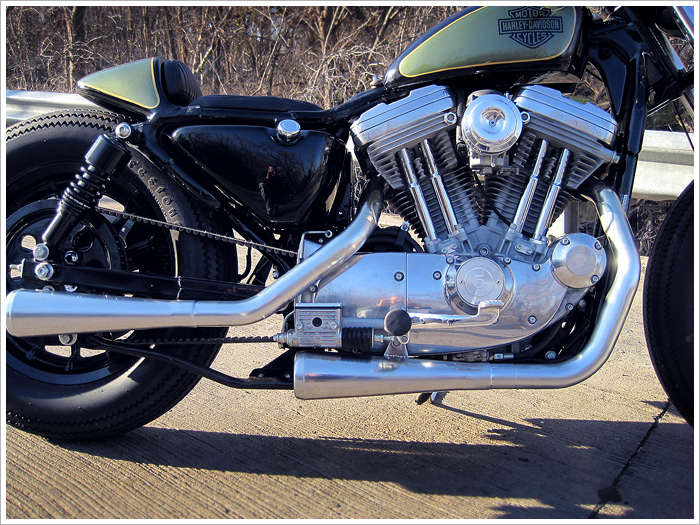
“I custom-made a license plate bracket to bolt onto the left passenger peg mount, but wanted to keep the brake light in plain view, so I mounted it to the left upper shock stud. For the exhaust, I wanted to keep it simple, so I kept the stock header pipes and just welded on a pair BUB mufflers. Only problem was the stock crossover tube between the headers had to go! I chopped it out, and then fabricated some ‘vintage elbow patches’ to cover the holes. You do remember those way-cool patches on your dad’s corduroy jacket, right? With mock-up complete, I sent the seat pans off to the best, Christian Marsh of Xian Leather, for the classic tuck-n-roll. Meclec Metal Finishing gave the pipes a cool vintage look by brushing the nickel before chrome-plating…a technique that I will definitely be using again in the future.”
Andy and Corey are both extremely happy with the final result. The bike has a distinctive racing look, while still maintaining a comfy riding position. “I hope this bike shows that it doesn’t always take a scratch-built custom to have a cool bike” says Corey. “Stock bikes do have potential, but sometimes it just takes a little imagination to get there.” Thank God for imagination.